An Easier Way to Rebuild Planets
Gregg Nader

Many transmission shops are trying to stay ahead in an increasingly competitive market by offering warranties longer than the original new vehicle factory warranty. Those shops putting their bottom line on the line have to pay attention to the planets if they’re not going to have a high rate of comebacks but, due to the high cost, installing all new OEM planets is rarely a good option. The alternatives include reusing the original parts; finding what you hope are good used parts; using someone else’s rebuilt parts; taking a chance on new aftermarket parts; or disassembling, inspecting and reassembling planets in your own shop.
There are degrees of risk with all of these options, but rebuilding your planets in-house is one of the best ways to control cost, quality and warranty exposure. That said, you have to give careful consideration to the parts you use. High quality, closely dimensioned needle bearings are a must. Thrust washers must meet or exceed the durability of OEM parts, including advanced PTFE-coated washers for some applications. Pins and gears must be manufactured to exacting hardness and bearing surface finishes.
In transmissions, space, weight and durability constraints are pushed to their limits. With modern high-torque, high-RPM engines, the transmission ratings have increased. For example, the same basic planet system used in the old TH400 is now rated at 885 lb-ft maximum gearbox torque and 22,000 lb. maximum gross combined vehicle weight in the 4L80-E.
In transmissions, space, weight and durability constraints are pushed to their limits. With modern high-torque, high-RPM engines, the transmission ratings have increased. For example, the same basic planet system used in the old TH400 is now rated at 885 lb-ft maximum gearbox torque and 22,000 lb. maximum gross combined vehicle weight in the 4L80-E.
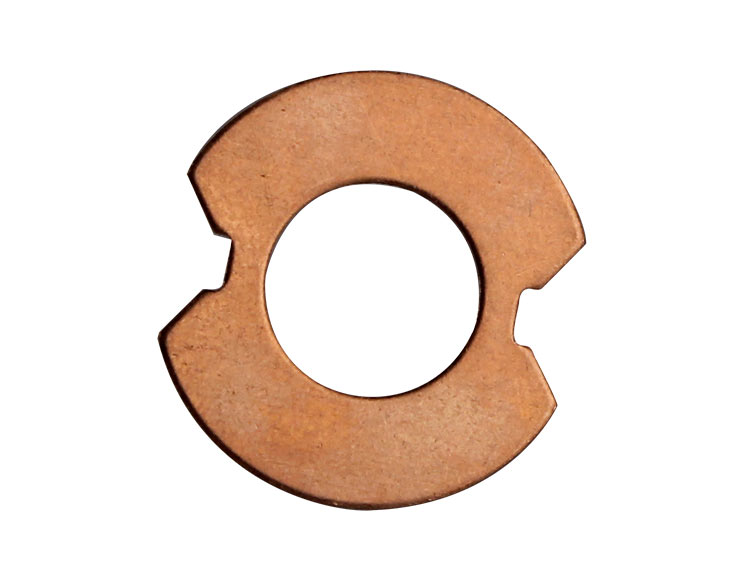
Planets wear, but a wiggle test by an experienced technician won’t detect degrading pins or needles. In many instances you can’t see or even detect pinion pin wear without disassembling the planet. The parts shown in Figure 1 felt smooth and tight as a new  planet, yet the pins and needles were badly worn.
Servicing the 4L80-E overdrive planet does not entail pin swedging. It’s simply a matter of inspecting and replacing the worn pieces. For swedged-in-place pins, you can disassemble by pushing the pin straight through with a press, or drill out one end of the pin to weaken the factory crimp and minimize the stress on the carrier as the old pin is pushed out. But disassembling the planet is the easy part – it’s getting it all back together that’s the hard part, and even when swedging the pins is not required, you’re still faced with a loose jumble of needle bearings.
We’re all looking for the easiest solution, but we still don’t have all the tools, fixtures and detailed instructions for recrimping planet pins for all applications. The reality is, you will have to get creative in setting up fixtures to service the planets you work on most often. But we do have some tips to help you set up a planet service center in your shop.
What’s the trick for swedging planet pins in place? Don’t think about using a hammer and punch: That method leaves too much room for error. Some larger rebuilders use a commercial floor-standing riveter to crimp pins in place. However, you can get the job done consistently and practically by using a typical hydraulic Hpress. You can use your existing shop press, or pick up one of the newer low-cost bench-top presses. For greater consistency it is best to add an accurate pressure gauge with a T-fitting to supplement the existing tons gauge. Make sure to take all necessary safety precautions that go along with using a powerful press.
The press shown in Figure 2 is being used to swedge pins in a 4T65-E input planet. If you’re just after replacing the captured bearing that commonly fails, then only two pinions have to be removed to install the bearing and the only other parts needed are two replacement pins.
For forming the crimps, there is a swedge-forming tool available from Allison. (See Figure 3 for tool and example of pin that was swedged with 3 tons of pressure in the press and Figure 4 for picture of the 4T65-E planet with two new pins swedged in place after replacing the captured bearing.) The results are a neat OEMstyle swedge that swells and forms the end of the pin. This one tool can be adapted to a number of different applications and pin diameters. For a more economical alternative, cross-shaped concrete chisels come in many sizes and are adaptable to swedging the pins.
 |  |
Crimping pins with a hammer and staking tool left many of us with that nagging feeling that if hadn’t been done perfectly, the planet would be waiting to create an expensive comeback. The control and consistency that come with using the hydraulic press and the appropriate crimping tool can make pin-swedging routine in your shop, and a procedure you can do with confidence.
Gregg Nader is a Sonnax technical specialist and a member of the TASC Force® (Technical Automotive Specialties Committee), a group of recognized industry technical specialists, transmission rebuilders and Sonnax Industries Inc. technicians.
Related Units
Related Parts
Required
Recommended
722.6
Output Shaft/Center Planet Pinion Washer 78580C-W
Fits .566" dia. pinion pins only.
- Material: Bronze
- Thickness: 0.040"
- Outer Dia.: 1.160"
- Inner Dia.: 0.568"
-
Helps cure:
- Lost or damaged component
Required
Recommended
4L60-E, 4L65-E, 4L70-E
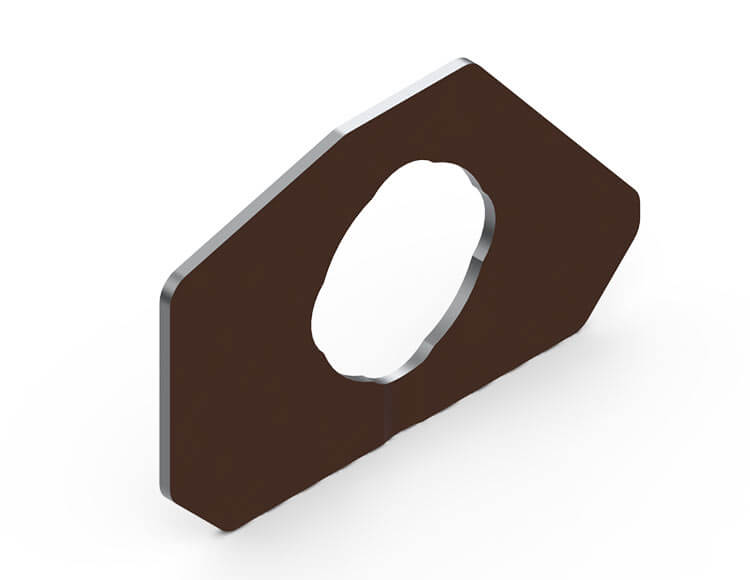
Batwing Washer 74582-01K
Fits 5-pinion front planetary.
-
Helps cure:
- Planetary failure
- Planetary wear

While Sonnax makes every effort to ensure the accuracy of technical articles at time of publication, we assume no liability for inaccuracies or for information which may become outdated or obsolete over time.