Valve Body Bore Preparation
We've all been there. You get your bench set up to clean and inspect the valve body, pull the first retaining clip…and then it happens. The first bore you touch ends up either having a stuck end plug, valve, sleeve or - worse yet – all of the above. Fast forward a few steps and, what the heck, how did that O-ring get torn? Why do I always end up with sticking valves on the way back together?
The thing to keep in mind is that most valve bodies use aluminum castings which can dent, scratch, and develop ridges very easily. Once this occurs, it can quickly lead to damaged components and lost time trying to repair them. The best place to start in avoiding this scenario is to understand why it happens.
Causes
With valves, bore wear is logical because of the movement involved when they are hydraulically actuated. Pressure regulation valves and those with PWM controls tend to wear more rapidly because of the constant oscillation involved. But how does a seemingly “stationary” component like an end plug wear? There are several ways this can happen.
Often end plugs are used as a spring stop. Even though they are not intended to stroke in the bore, valve forces are transferred through the spring, causing movement of the plug. A similar action can occur if the end plug is used as a stop for the valve itself. Some valves also may have a passage on the outboard end that applies varying amounts of hydraulic pressure at the end plug, causing it to oscillate. On top of all this, end-plug-to-bore clearances often can be larger, causing a loose fit initially that only gets worse over time.
Damage inflicted by the rebuilder from removal techniques is another problem. Care must be used during disassembly to avoid bore and component damage from the improper use of tools. Let’s discuss some methods of preventing these occurrences.
Disassembly Tips
| Figure 1 | Figure 2 |
|---|---|
 |
 |
| If you have threaded plugs, use a bolt or slide hammer to remove it easily from the bore. | Use a blunt dental pick to avoid nicks. |
Valves
The trick with a stuck valve is to concentrate on the face of the spool, staying away from the edges or outside diameter. Dents and scratches on these surfaces can wedge the valve even further, and quickly lead to irreversible bore damage. Dental picks (Figure 2) with blunt edges work great for this, because they won’t cause nicks like a pick or screwdriver often can. In the event the valve is severely stuck, compressed air and a wet air test plate can be used to push it out of the bore.
Another option is to fashion a tool from a tube, threaded bolt, etc. to either use as a punch or as a method of attaching a slide hammer to the end of the valve. This will typically damage the valve, but will at least keep the bore intact.
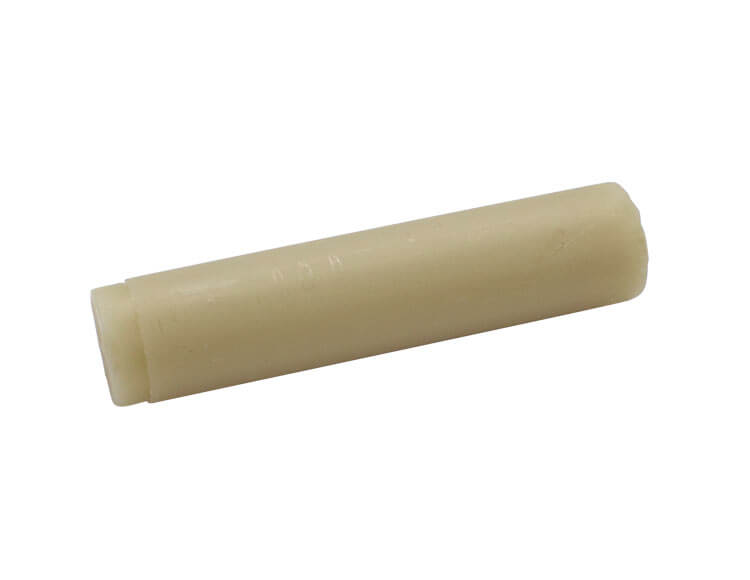
Removing Sleeves
Sleeves often will have a protruding stem that can be used as a point to grasp with pliers (Figure 3). Work the sleeve back and forth carefully to prevent contacting the outside of the sleeve or bore surface.
Once you are ready to put things back together, there are a few techniques which can be beneficial during the reassembly process.
| Figure 3 |
|---|
 |
Reassembly Tips
Inspect the Bore Opening
Nicks and ridges often can be difficult to see, but are easy to locate by dragging a pick down the edge of the cast-in chamfer (Figure 4). If necessary, a small diameter flap wheel chucked in a miniature die grinder can help smooth ridges.A non-abrasive tool such as a radial wire brush also can work great for de-burring the bore for O-ringed sleeves.
Size & Lube O-Rings Before Installation
When installing O-rings, roll the plug or sleeve on a flat surface to size (Figure 5). This will help prevent cuts and tears. Lubricate the O-ring(s) for best results. Products such as Sonnax Slippery Stick™ O-LUBE, P-80 rubber lubricant and a 50/50 mixture of STP oil treatment and ATF will make the installation much easier.| Figure 4 | Figure 5 |
|---|---|
 |
 |
| Drag a pick along the edge of a bore opening to find any hidden nicks or ridges. De-burr the bore with a wire brush - this is a great way to clean it up and ensure O-ringed parts are not damaged during installation. | Rolling the plug or sleeve on a clean, flat surface will help seat the ring to prevent cuts and tears. |
Cleanliness is Your Best Friend!
Always clean bores of any unit debris on disassembly as well as after using a radial wire brush, flap wheels or emery cloth. Failure to do so can result in sticking of the components you have worked so hard to repair.Soft bristle bottle brushes in various diameters used in a cleaning tank work well for this (Figure 6). Dry the cleaning fluid off with a blow gun and re-check for particles of debris (Figure 7).
Encountering a dilemma or two during a valve body rebuild is a normal part of the transmission world, but learning to adapt as these situations arise is your best defense. Hopefully by implementing these tips in your repair practices, they will provide more consistent results, less rework and quicker turnaround times.
| Figure 6 | Figure 7 |
|---|---|
 |
 |
| Clean the bore on disassembly. | Dry off the cleaning fluid with a blow gun. |
Related Parts
Required
Recommended
Slippery Stick O-LUBE
Specially formulated lubricant to facilitate O-ring & seal installation
While Sonnax makes every effort to ensure the accuracy of technical articles at time of publication, we assume no liability for inaccuracies or for information which may become outdated or obsolete over time.