August 18, 2017
Reaming Instructions: If VB-FIX Required
These instructions are for Sonnax tool kits whose part numbers begin with "F-" to indicate they require use with the Sonnax valve body reaming fixture VB-FIX .
General "F-Tool" Reaming Instructions
1. Bore Preparation
a. Clean the bore thoroughly in a solvent tank.
b. Generously lubricate the bore and reamer with cutting fluid (i.e. Mobilmet S-122, Lubegard® Bio-Tap, Tap Magic™, etc.). For best results, provide a continuous flow of water-soluble cutting fluid (i.e. Mobilmet S-122) during the reaming process.
c. The reamers should be turned using a low RPM, high-torque drill regulated to a maximum of 200 RPM.
d. Examine the bore after cleaning for surface finish, debris and burrs. Flashing and burrs on the exit side of land and in bores must be carefully removed. A small piece of Scotch-Brite™ material attached to a wire and powered with a drill motor is ideal for the task. However, Scotch-Brite™ is a very abrasive material and all residual Scotch-Brite™ debris must be removed afterward to ensure particles do not migrate or remain embedded in the surface. Cleaning this material out should involve several progressive steps using solvent on a lint-free rag.
Cautions & Suggestions |
|
2. Bore Reaming
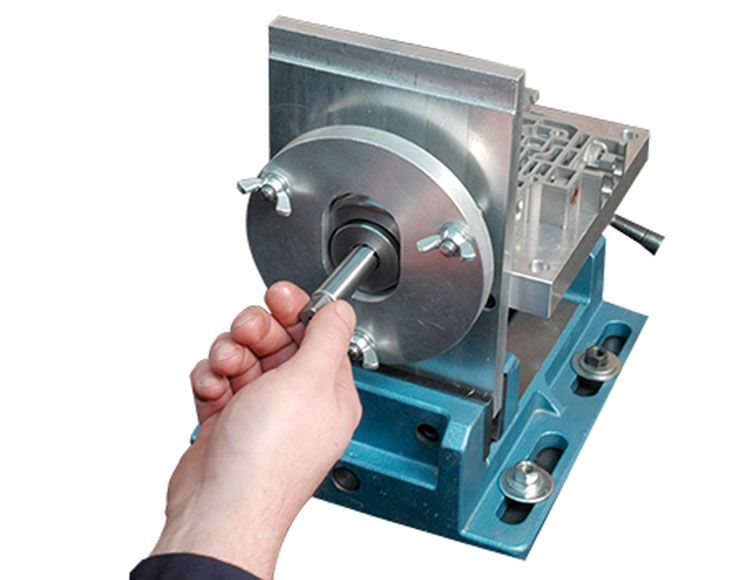
Use the associated “F-Tool” kit and VB-FIX reaming fixture as illustrated below to ream the bore.
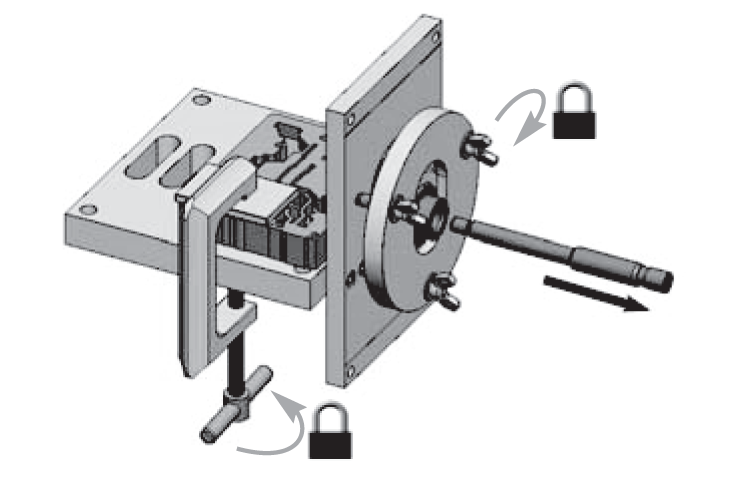
1.
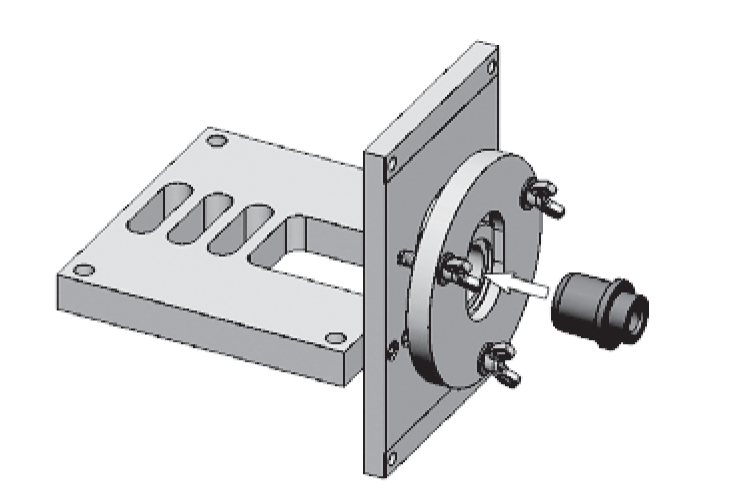
Insert the reamer jig
Insert the reamer jig
2.
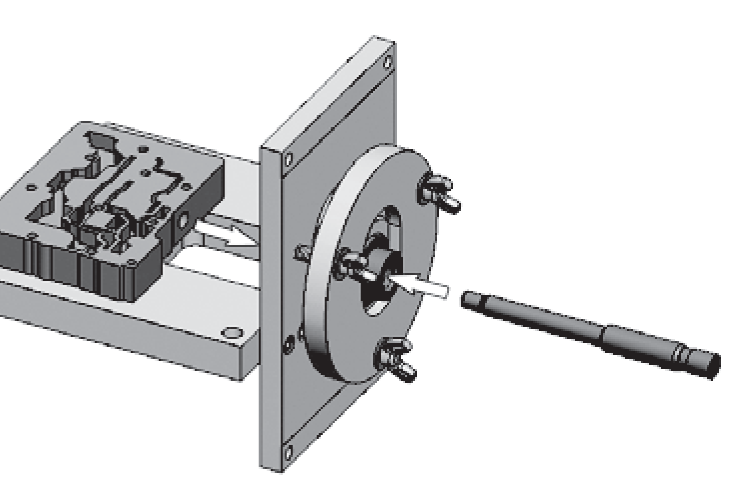
Align the guide pin and valve body.
Align the guide pin and valve body.
3.

Tighten the clamp.
Guide pin must move freely.
Tighten the clamp.
Guide pin must move freely.
4.
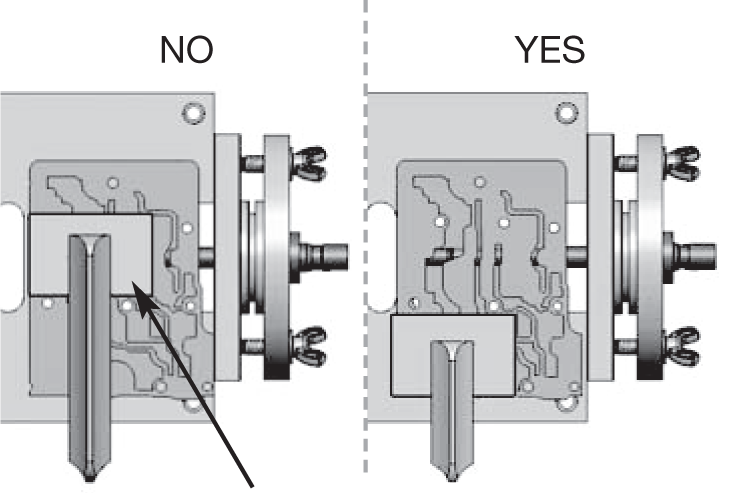
Do not clamp over bore. Leave gap.
Do not clamp over bore. Leave gap.
5.
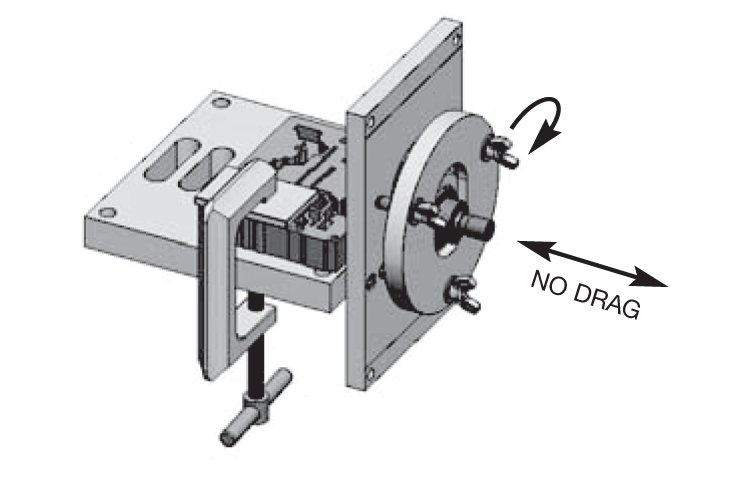
Tighten wing nuts.
Guide pin must move freely.
Tighten wing nuts.
Guide pin must move freely.
6.
Remove guide pin. Do not loosen clamp or wing nuts.
Remove guide pin. Do not loosen clamp or wing nuts.
7.
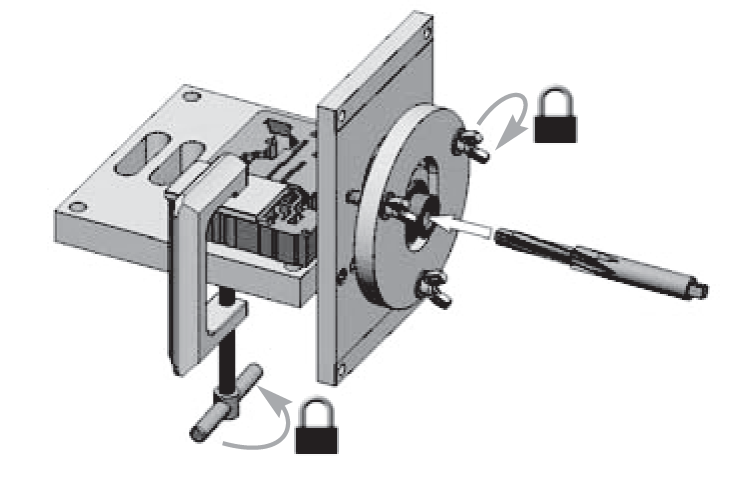
Insert the reamer.
Insert the reamer.
8.
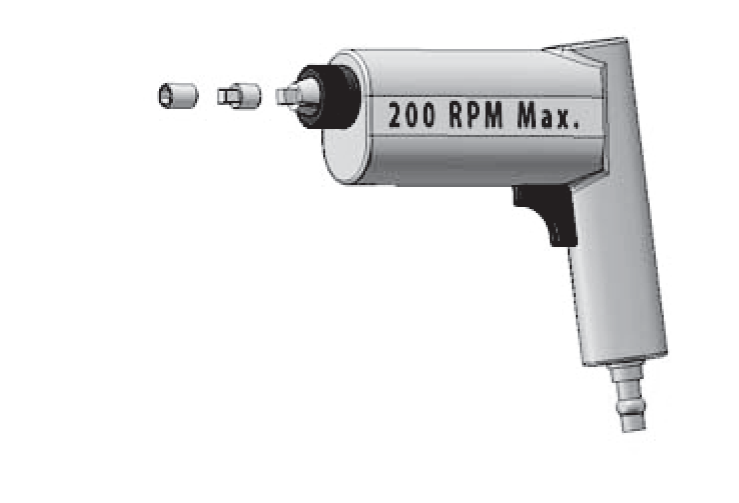
Use a loose fitting reamer socket, a wobble adapter and a regulated air drill.
Use a loose fitting reamer socket, a wobble adapter and a regulated air drill.
9.
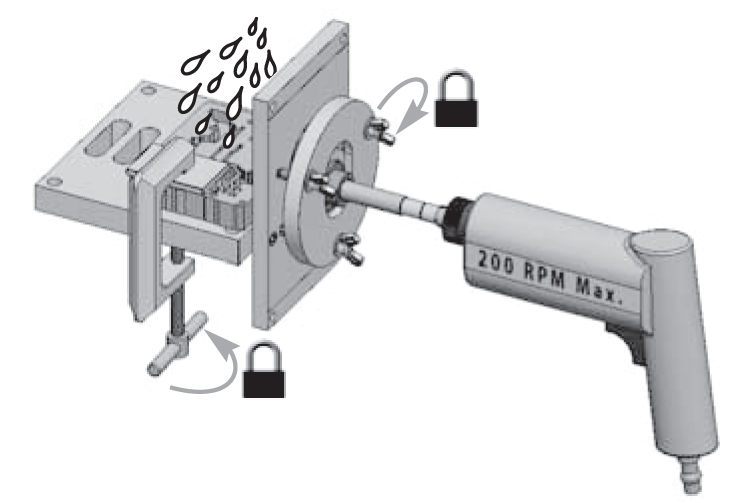
Use a continuous supply of cutting fluid and little or no inward force.
Use a continuous supply of cutting fluid and little or no inward force.
Learn More
Related Parts
Required
Recommended
Valve Body Reaming Fixture VB-FIX
-
Helps cure:
- Some worn valve & pump bodies cannot be salvaged
While Sonnax makes every effort to ensure the accuracy of technical articles at time of publication, we assume no liability for inaccuracies or for information which may become outdated or obsolete over time.