How to Set Up a Snap-on® Scanner for Dodge Secure Vehicle Gateway™ Protocol
Jim Mobley
If you have tried to scan a ’18-later Chrysler/Dodge vehicle you may have found a notice on your scanner that the secure gateway is locked. You can only read codes and are unable to perform clearing of codes or resets. Chrysler is the first company to implement this, and others may follow in the future. In a nutshell, the reasoning behind the new Secure Gateway system is to only allow registered persons and devices on Chrysler vehicles and company communication networks. Technically this is a security device just like any other network component.
Here is a brief explanation of what the Secure Gateway consists of. It is a physical module like any other in the vehicle’s network of electronics. Once you are registered to have Secure Gateway sessions with your scanner and devices such as J2534 programming interfaces, you can then perform resets and clear codes. As a note, procedures may change at any time. Snap-on recommends visiting www.snapon.com/gateway for the most up-to-date information.
Basic Requirements
- Wi-Fi network access for your Wi-Fi Snap-on scanner or device at shop. Wi-Fi is not necessary while out driving during data event capture.
- Once implemented, a Secure Gateway scanner session is active for about two hours.
- The network settings for your Windows-based scanner should be a private network, not a public network.
- The scanner/device should have proper time, date, and time zone.
- Windows-based scanner should be free of viruses and scanned regularly.
First Step: Scanner
- From your scanner home screen select “System Settings” or “Tools."
- Select “Get Connected.” This screen will have the device serial number, pin code and authorization number you will need later for registration. Keep this screen open for next steps.
Second Step: AutoAuth® Website
- From your scanner/device or shop PC, go to www.autoauth.com.
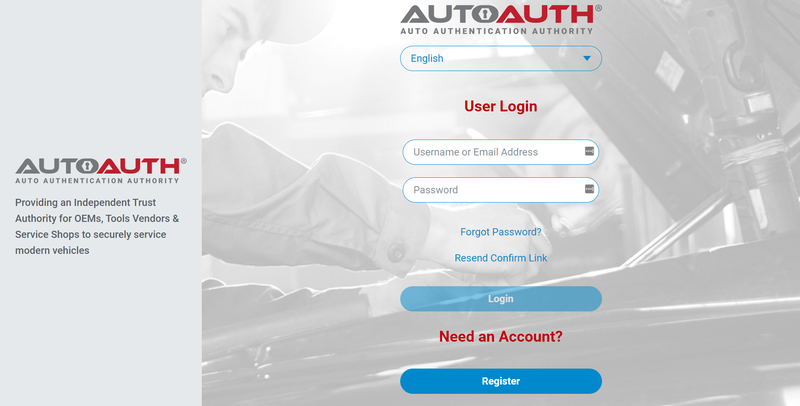
- Click the "Register Now" button.
- Select the "User" tab in the upper left corner.
- Create your own unique username and password. Link an email address to the account.
- Check your email for a message asking you to confirm account sign-up. After validating the account, follow the on-screen instructions.
- Click the "Register Now" button as before.
- Select the "Service Center" tab in the upper left corner of the webpage. This page will allow you to register the name of your shop. You will need to input your individual account credentials as well. NOTE: AutoAuth charges a $50 annual fee for using their authentication services.
- After inputting the necessary information, click the "Sign Up" button at the bottom of the screen.
- Select "Manage Tools," then complete the required fields: Manufacturer, Model and Serial Number. Your account and shop must be established first. This will link your diagnostic equipment to the AutoAuth website.
- To finalize this action, click the "Add" button. You are now done with AutoAuth!
Third Step: Snap-on Technician Profile (Individual Account)
Please Note: You must use a Technician Profile Manager (individual) account. If logged into Shop Profile Manager, select “LOGOUT” from top right and then log into an individual account or create one by clicking on “Create a new Individual Account.” This will not work with only a shop profile account. It must be an individual account. It is OK and recommended to add your shop information to your technician profile. Click here if you would like to view a Snap-on video of the current procedures.
From your scanner/device or shop PC, go to www.altusdrive.com.
- If you already have a Technician Profile Manager account, log in and go to step 3. You would have a profile manager account if you have previously accessed SureTrack® Community or ALTUS™ drive.
- To create a profile manager account, click button “Create Individual Account.”
Once your account is created, go to the login page, log in and go to the “Device Management” tab. - Enter your Scan Tools pin code, serial number and authorization number. As described in the First Step go to “System Settings” or “Tools,” then select, “Get connected.”
Next select the “Secure Vehicle Gateway” tab. Please Note: If the “Secure Vehicle Gateway” tab is missing, you are likely logged into a shop profile. Select “LOGOUT” from top right and then log into an individual account or create one by clicking on “Create Individual Account” as in step 2 above.
Select "Add Secure Credentials."
Add the credentials you created at www.autoauth.com or www.webapp.autoauth.com to access FCA vehicles.
Now you will be able to unlock Dodge Secure Vehicle Gateways.
Please Note: With the vehicle Secure Vehicle Gateway unlocked, you should be able to utilize your scanner just like you ordinarily would on any vehicle. Let’s not forget, as always, to perform basic background checks before condemning Dodge over the Secure Vehicle Gateway system.
Thank You to AutoAuth and Snap-on Diagnostic Product Support for much of the source information in this article.
If you need any assistance with the Dodge Secure Vehicle Gateway concerning your Snap-on scanner/device, their company contact Information is below.
Phone: 800-424-7226
FAQ: diagnostics.snapon.com/FAQ
Email: [email protected]
Jim Mobley is Sonnax Technical Communications Specialist. He is a member of the Sonnax TASC Force (Technical Automotive Specialties Committee), a group of recognized industry technical specialists, transmission rebuilders and Sonnax Transmission Company technicians.
Related Units
While Sonnax makes every effort to ensure the accuracy of technical articles at time of publication, we assume no liability for inaccuracies or for information which may become outdated or obsolete over time.