April 21, 2021
Diagnosing 8L45 & 8L90 Shift Complaints: Always Check the VFS Solenoid Circuits
Maura Stafford
A new unit popping up on everyone’s bench lately is the GM 8L90. Starting in the 2015 model year, this series of transmissions is used in a variety of GM longitudinal-engine equipped vehicles and includes the smaller (but essentially similar) 8L45 for lighter-duty applications.
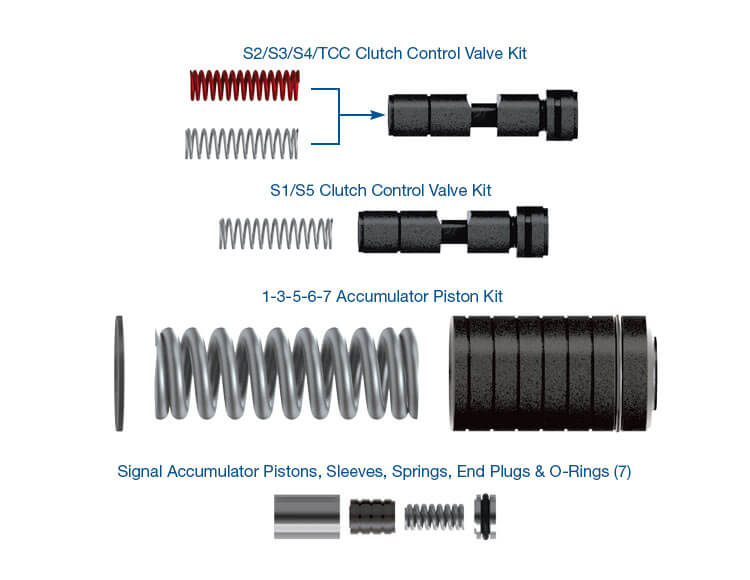
As these transmissions have reached the aftermarket, builders have recognized some chronic shift quality issues. The source of this can often be traced to wear in the signal accumulators of the control solenoid valve body. We have found Sonnax signal accumulator piston kit 154740-06K and Sonnax shift Zip Kit® 8L45-8L90-SHIFT-ZIP are popular solutions at helping address this wear. While these kits are great at eliminating pressure loss, I wanted to share some tips that can help make the testing and installation process easier to navigate.
| Signal Accumulator Piston Kit – 154740-06K | Shift Zip Kit – 8L45-8L90-SHIFT-ZIP |
|---|---|
 |  |
The best way to determine if our repairs are needed is with vacuum testing. The OE accumulator piston and spring can also be blocked in place with varying-length pins in different positions to establish wear over the full stroke of the piston. The following Sonnax tech article discusses this more in depth: Diagnosing 8L45 & 8L90 Shift Complaints: Always Check the VFS Solenoid Circuits.
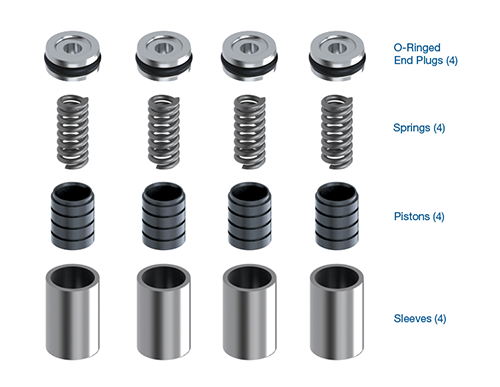
Gauge pins can also be a helpful tool in identifying bore wear if vacuum testing isn’t available. The Sonnax Zip Kit includes enough components to service all seven signal accumulator bores, but our experience shows that the S3 and S4 locations are generally the worst. This is why the smaller Sonnax kit 154740-06K just services four of seven signal accumulator bores. For casting wear beyond the scope of our drop-in repairs, we also offer Sonnax oversized signal accumulator piston kit 154740-01K.
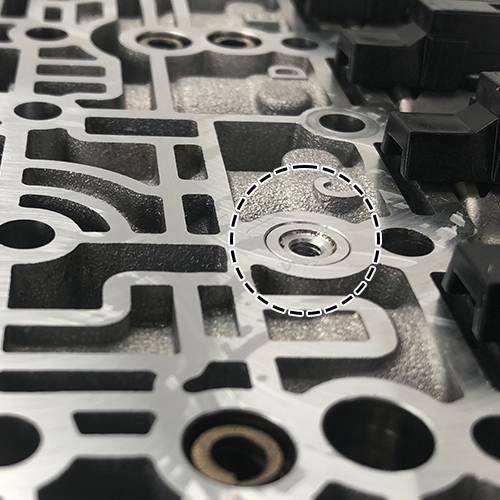
Test fit the sleeve and end plug. Make sure the step on the plug is facing down towards the spring and into the sleeve (Figure 1). Due to casting variations, it may be necessary to file the sleeve slightly for the end plug to sit flush. Be sure to dress the outside edges of the sleeve to remove any burrs that may have developed. These details are very important, as an end plug that sits too high will not allow the two casting halves to seal, causing cross leaks and pressure loss.
| Figure 1 – End Plug Flush in Casting |
|---|
 |
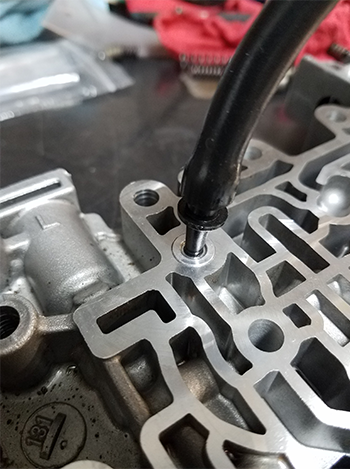
After test fitting the sleeves in the bores, make sure to clean all parts thoroughly before final installation. Once completed, vacuum test each bore to verify your repair by simply installing a small test tip into the hole of the end plug (Figure 2). Remember to reset your adaptive tables and perform a relearn post repair or shift concerns may occur.
| Figure 2 – Vacuum Test Each Piston Bore |
|---|
 |
April 21, 2021
Maura Stafford
Required
Recommended

While Sonnax makes every effort to ensure the accuracy of technical articles at time of publication, we assume no liability for inaccuracies or for information which may become outdated or obsolete over time.